Microsoft is looking to purchase Mojang the creator of Minecraft!
If your child has recently delved into the pixelated world of Minecraft, you might be wondering what all the fuss is about. As your resident family gaming guide, I’m here to walk you through the basics of Minecraft’s Survival Mode, the game’s most popular playing option. This comprehensive guide will provide you with parent-friendly explanations and tips to help you understand the game and perhaps even join your kids in their creative adventures.
Understanding Minecraft Survival Mode
Minecraft Survival Mode is where players must gather resources, build shelters, craft tools, and survive against environmental challenges and creatures. Unlike Creative Mode (where players have unlimited resources and no survival pressures), Survival Mode presents genuine challenges that develop problem-solving skills, resource management, and planning abilities in players of all ages.
Minecraft carries an ESRB rating of E10+ (Everyone 10+), making it appropriate for most school-aged children, though younger players can certainly enjoy it with some parental guidance.
The Survival Mode Difficulty Settings
Minecraft offers four difficulty levels in Survival Mode, each affecting gameplay in significant ways:
Peaceful: No hostile monsters spawn, hunger depletes very slowly, and health regenerates quickly. Perfect for younger children or those new to gaming.
Easy: Monsters appear but deal less damage, hunger depletes at a moderate rate, and players can still regenerate health if their hunger bar is nearly full.
Normal: The standard experience with balanced monster damage and hunger depletion. Health regenerates more slowly.
Hard: Monsters deal maximum damage, hunger depletes faster, and some monsters have special abilities (like zombies breaking down wooden doors). For experienced players looking for a challenge.
Family Tip: Start younger children on Peaceful or Easy and adjust as their confidence and skills grow. You can change difficulty at any time from the pause menu.
The Day/Night Cycle
Minecraft operates on a consistent time cycle that significantly impacts survival gameplay:
- One full Minecraft day-night cycle lasts 20 minutes real-time
- Daytime lasts 10 minutes
- Sunset/dusk transition lasts about 1.5 minutes
- Nighttime lasts 7 minutes
- Sunrise/dawn transition lasts about 1.5 minutes
Understanding this cycle is crucial because:
- Most hostile creatures spawn in darkness
- Crops only grow during daylight hours
- The first day is critical for resource gathering before nightfall
Planning Around the Cycle: Encourage your child to use daylight hours for outdoor activities like gathering resources, exploring, and building. Nighttime is better spent mining underground, organizing inventory, crafting, or staying safely indoors.
Gathering the Minecraft Essentials

Starting the Journey: Gathering Essential Resources
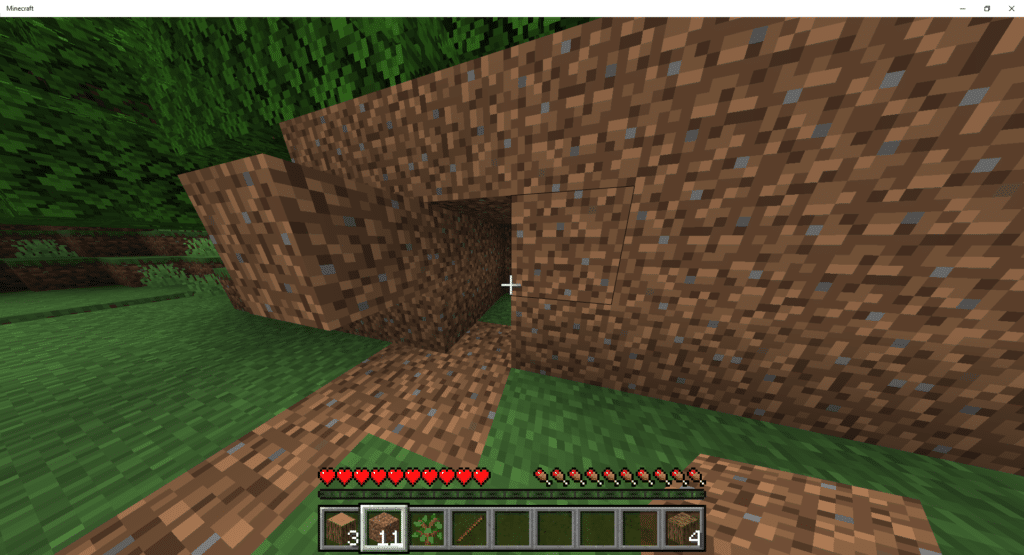
First Steps: Wood is Life
The first step in Minecraft is collecting basic resources. Encourage your child to start by punching trees to gather wood blocks. Each wood block breaks down into wooden planks, which serve as the foundation for nearly everything they’ll need to survive their first day.
Quick Tip: Four wooden planks create a crafting table, which is absolutely essential for progress in the game. Without it, players can only craft the most basic items.
Creating Basic Tools
Once they have a crafting table, they can create basic tools like:
- A wooden pickaxe for mining stone
- An axe for faster wood collection
- A sword for protection
- A shovel for digging dirt and sand
These initial tools will be made from wood and won’t last long, but they’re necessary stepping stones to better equipment.
Stone Age Advancement
With wooden tools in hand, the next step is to gather stone (called “cobblestone” in the game). This requires using a pickaxe on stone blocks found in hillsides or just below the soil surface.
Eight cobblestone blocks can be used to craft a furnace, which opens up cooking and smelting capabilities: 8 Cobblestone = 1 Furnace
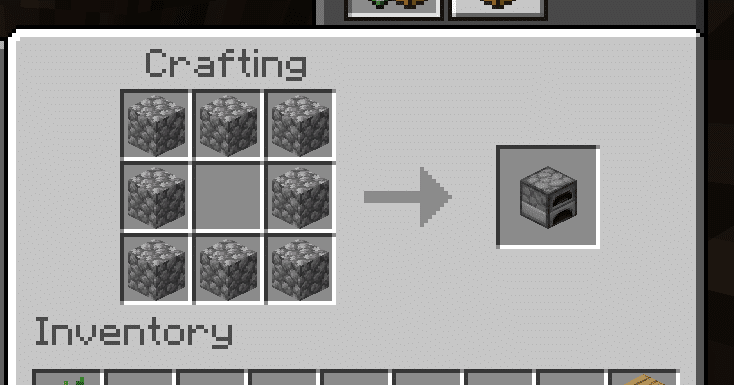
Creating a furnace is a major milestone that allows players to:
- Cook food (which restores more hunger points)
- Smelt ores into usable metals
- Create charcoal by “cooking” wood logs (a great early-game alternative to coal)
Surviving the Night: Creating Safety
Building Your First Shelter
As the sun begins to set on your first day in Minecraft, creating shelter becomes paramount. This is where the game’s creativity really begins to shine!
Family Activity Idea: Ask your child to show you their shelter design. This can spark conversations about architectural choices and problem-solving strategies they used.
Shelter requirements are minimal at first:
- Four walls
- A roof
- A door for safe entry and exit
- Space for essential crafting stations (crafting table and furnace)
Many novice players simply carve a small room into a hillside for their first night – a perfectly viable strategy! As they progress, they can expand this humble beginning into something more elaborate.
Lighting: More Than Just Ambiance
In Minecraft, darkness is an invitation for trouble. Crafting torches using coal and sticks to light up the shelter and surrounding area is a great way to keep those pesky monsters at bay.
Creating torches using coal/charcoal and sticks illuminates spaces and prevents monster spawning: 1 Coal/Charcoal + 1 Stick = 4 Torches.
Safety Tip for Parents: Encourage your child to place torches liberally around their shelter and nearby areas. This simple habit significantly reduces in-game dangers.
Health and Hunger Management
The Health Bar (Hearts)
The row of hearts at the bottom of the screen represents your player’s health. When it depletes completely, the player “dies” and respawns, potentially losing items and progress.
Health can be lost through:
- Attacks from hostile mobs
- Falling from heights
- Drowning
- Lava or fire damage
- Starvation (when hunger is completely depleted)
Restoring Health: With a full hunger bar, health regenerates naturally. Players can also restore health instantly with healing potions or golden apples (advanced items).
The Hunger Bar
This bar of drumsticks next to the health bar represents your character’s satiation level. It depletes gradually over time and more quickly during strenuous activities like:
- Sprinting
- Jumping repeatedly
- Swimming
- Fighting
When hunger reaches zero, players cannot sprint, and health begins to drain slowly (except on Peaceful difficulty).
Efficient Hunger Management:
- Always cook food before eating (raw chicken can even cause food poisoning)
- Carry multiple food types
- Don’t sprint unnecessarily
- Establish sustainable food sources early (like wheat farms or animal pens)
Food Value Guide:
- Steak/Cooked Porkchop: 8 hunger points (the best common foods)
- Baked Potato: 5 hunger points
- Bread: 5 hunger points
- Cooked Fish: 5 hunger points
- Raw Vegetables: 1-3 hunger points
Family Discussion Opportunity: Talk with your child about how Minecraft’s hunger system teaches resource management and planning ahead – skills that transfer to real life!
Inventory Management
Managing limited inventory space is a crucial skill in Survival Mode that teaches organization and prioritization.
Understanding the Minecraft Inventory System
The player’s inventory consists of:
- A hotbar with 9 slots for quickly accessible items
- A main inventory with 27 additional slots
- An off-hand slot (shield or torch typically)
- Four armor slots
Essential Inventory Tips:
- Prioritize Tools: Keep essential tools (pickaxe, sword, shovel, axe) in your hotbar for quick access.
- Organize by Category: Group similar items together (building blocks in one area, food in another).
- Carry Only Necessities: When exploring, bring only what you need plus some emergency supplies.
- Essential Exploration Loadout:
- Tools (pickaxe, shovel, axe)
- Weapon
- Torches (at least 20)
- Building blocks (64+)
- Food (at least 20 hunger points worth)
- Crafting table and furnace
Use Storage Efficiently: Create storage systems at your base using chests: 8 Wooden Planks = 1 Chest (27 storage slots).
- Double Chests: Place two chests side by side to create a large chest with 54 storage slots.
- Create a “Dump Chest”: Have one chest near your home entrance where you can quickly deposit items when returning from an expedition.
Storage Organization Skills: Help your child develop categorization skills by suggesting chest labels or organization systems:
- One chest for building materials
- One for ores and valuable resources
- One for farming supplies
- One for extra tools and weapons
Family Gaming Opportunity: Help younger players develop organizational skills by suggesting category systems for their chests: one for building materials, another for tools, etc.
The Mining Adventure
Mining isn’t just in the name—it’s a core gameplay element that provides access to valuable resources hidden underground. As your child’s skills progress, they’ll want to venture deeper for resources like:
- Coal: Essential for torches and smelting
- Iron: Creates more durable tools and armor
- Redstone: Used for electrical-like circuits and mechanisms
- Diamond: The premium resource for top-tier tools and armor
Safety First: Remind young miners of these underground safety tips:
Mark the path back to the surface with torches or signs
Always bring plenty of torches
Create staircases rather than vertical shafts
Never dig straight down (a cardinal rule – there might be lava below!)
The Importance of Beds in Minecraft
Sweet dreams are made of sheep.
~ Steve (Maybe)
Creating a bed revolutionizes survival gameplay in two crucial ways:
- It allows players to skip the dangerous nighttime by sleeping
- It establishes a spawn point, meaning if your character “dies,” you’ll return to your bed rather than the original spawn location
To craft a bed: 3 Wool (same color) + 3 Wooden Planks = 1 Bed
Getting Wool: Wool comes from sheep, which can be “sheared” (with shears crafted from two iron ingots) or defeated for 1-3 wool blocks.
Exploring the Minecraft World Safely
Minecraft’s world is virtually endless and filled with varied biomes (environmental regions) like forests, deserts, jungles, mountains, and oceans. Each offers unique resources and challenges.
Exploration Checklist
Before venturing far from home, ensure your young explorer packs:
- Plenty of food
- Weapons for protection
- Tools for gathering resources
- Torches for safety and marking the return path
- A bed to set temporary spawn points
Navigation Tip: Suggest that your child build tall landmarks near their home base or create maps to avoid getting lost in their explorations.
Learning Through Play
Minecraft Survival Mode offers exceptional educational opportunities disguised as play. As you observe your child’s adventures, you might notice them developing:
- Resource management skills
- Planning and foresight
- Spatial awareness
- Basic mathematical concepts (crafting recipes often require specific quantities)
- Problem-solving strategies
- Creative expression through building
- Reading comprehension (in-game guides and recipe books)
Joining Their Adventures
If you’re interested in sharing this experience with your child, consider setting up a family Minecraft world where you can build together. This creates wonderful opportunities for collaboration, teaching moments, and seeing your child’s creativity in action.
Getting Started Together: Ask your child to be your guide. Most kids delight in showing their parents around their virtual worlds and teaching them the game mechanics.
Conclusion
Minecraft Survival Mode is far more than just a game; it’s a platform for creativity, learning, and growth. By understanding the basics of Survival Mode, you can engage in meaningful conversations with your child about their in-game achievements and challenges. The resource management, creative problem-solving, and organizational skills they develop in Minecraft often translate to real-world abilities.
Remember, there’s no “right way” to play Minecraft—the open-ended nature is part of its charm and educational value. Whether your child builds elaborate castles or focuses on underground mining expeditions, they’re developing important skills while having fun.
Happy crafting and exploring with your family!
* The big blocks in Minecraft aren’t pixels. They are Voxels, but that’s none of our business.